Wednesday, November 11, 2015

Busy Morning Corn Muffins

There really is nothing like fresh muffins right out of the oven, but who has the time?   You do!   


Here's how I save time in the morning. If I'm already pulling out all the ingredients, measuring spoons and cups I also pull out a 2nd bowl or more and here's why:   

  • You can make at least 1 extra dry mix and store individual recipe portions in air tight containers. 
  • Please remember to label them as muffin mix so there's no confusion later.  
  • Label the container with the liquids you need to add and baking times also.  
  • This is like making your own box mix muffins without the chemicals and with out over paying!
  • Do this the night before, days ahead or even weeks ahead.
  • This is also a nice gift mix to bring with you too  (dress up the packing and attach instructions for finishing and baking)

I often use those quart size deli containers since I have so many I've saved with Chinese takeout over the years.  Love those containers for portioning and storing soup stocks, marina and other sauces also.

These muffins are perfect on their own or slathered in butter and a bit of jam.  For variety why not add 1/2 cup of dried cranberries, dried blueberries, or even some thawed and drained frozen corn for texture and flavor.   I've also occasionally added some chopped jalapeno peppers (be careful of the amount use less than 1/2 cup), some cheddar cheese or even crumbled bacon.   Yum!!  Experiment!!

You'll enjoy the linger heavenly aromas to start your day from the kitchen.   These are also good later in the day with a side of a nice home made chili too.  Additionally, you can always freeze some too. 

Treat yourself well, your body with thank you for it!


Just out of the oven and waiting for you!


 Busy Morning Corn Muffins 

1 cup all purpose flour
1 cup cornmeal
1/2 cup sugar
1/2 teaspoon salt
1 Tablespoon baking powder
1 cup milk (regular, buttermilk or even almond milk)
¼ melted unsalted butter or flavorless oil
2 eggs

Equipment you’ll need ready:

2 bowls  (1 for dry, 1 for wet)
liquid and dry measure cups
measuring spoons
muffin tins to make 12 regular sized muffins (not the huge muffin tins)
cooling rack
whisk (if you have one)
wooden spoon
rubber spatula
cupcake papers  (or grease the muffin tin very well)


Pre-Heat oven to 500 degrees

Bowl 1 - Dry:

Mix flour, cornmeal, sugar, salt and baking powder whisking till all ingredient are completely mixed so ingredients are evenly dispersed.  I love using the whisk for this.


Bowl 2 –Wet:

Thoroughly blend eggs, milk and oil together.

You can add wet to dry bowl just mix well enough so nothing is dry sticking to the sides of the bowl but don’t beat.  Use a scraper of wooden spoon to mix thoroughly  - over mixing (no electric beaters please) will make for tough muffins!

Evenly fill the muffin tins.  Using a scoop* helps with aim into the cup part or even a dry measure ½ cup size would be beneficial so they are all the same size which makes for nicer presentation and more even baking.  Note: I find it easier to wipe batter that didn’t make it into the cups before baking is easier than scrubbing it off later.


Evenly fill muffin cups

Pop the tin into the oven and as soon as you close the door LOWER the oven temperature to 400ยบ bake 18-20 minutes.  This super hot then lower method will allow the muffins get that nice domed look. 

You’ll smell their beautiful fragrance as they are approaching done. When muffins are done, take muffins out of tin and cool down to just warm before eating.


*Note: My kitchen stainless tableware set came with a small ladle I love to use for making muffins and also for pancakes.

Tuesday, October 27, 2015

Dessert in a hurry....Baked Cranberry Orange Rice Pudding

Love to exercise my creative side especially in the kitchen!  How often have you been bored making the same old thing even though you have favorite recipes?   Always great to have a change of pace in life whether it's wearing something new, trying a new restaurant, or even traveling. 

Often I just head to the kitchen and see what's there and experiment.  Not everything turns out as perfect as it sounded in your head!  Inspiration for this recipe was a large container of white rice from the local Chinese restaurant that was leftover.   I could have turned this into a quick fried rice but had a sweet tooth that needed satisfying!   

What's on hand and what can I create?

Rice....dried cranberries and that led me to think cranberry orange relish flavor profile!  Always have the staple of milk, eggs, vanilla, natural extracts and usually fruit too. Find it quite handy to keep the Cinnamon and Sugar blend on hand also which is a great addition to oatmeal, hot coffee, tea, dusting on toast or a warm buttered muffin.  Yum!!  Keeping a nicely stocked with basics pantry allows you to "create" things in a hurry and on the fly.   Kind of the home version of Chopped with ingredients you know!

This is a super easy dessert to throw together quickly any night of the week.  Perfect to make ahead too for the next day. 

Ciao for now!!


Baked Cranberry Orange Rice Pudding

2 cups cooked rice
2 cups milk
2 eggs
1T butter
½ tsp orange extract
1 tsp orange zest
1/4 tsp almond extract (or real vanilla extract)
½ cup sugar
 pinch of salt (if the rice was not cooked with salt)
 1/8 tsp nutmeg
 ½ - ¾ cup dried cranberries (or raisins)

 Cinnamon sugar blend (see below)*   

**Note:  If you want this really rich try using part half and half or cream for part of the milk.                                   
                                                      

Preparation:

Butter baking dish or casserole 2-1/2 quart will work unless you're making a larger batch.  Add cooked rice to casserole.   I use my fingers to break the grains up so they're loose. Do that only if the rice is cold and coming out of the refrigerator. Then once grains are loose, mix in the cranberries or other dried fruit.   If your rice is still warm cool it to room temperature first so the eggs won't seize and scramble.  The dried fruit can be mixed into hot fresh cooked rice without a problem.

In a bowl, beat eggs, add to milk, extracts, zest and sugar; stir to blend.     

Pour into buttered baking dish on top of the rice and fruit mix. 


Ready for oven...notice the way all the rice is covered with the liquid.

Bake 375 degrees for 45-50 minutes until set.  Take a sharp knife go straight down into the middle, if it comes out clean, the pudding is done. 

While hot, sprinkle with cinnamon sugar mix so that it melts onto top

Remove from oven, give a light sprinkle of *cinnamon sugar blend. Cool, serve with or without vanilla whipped cream.

Serve in a nice glass, desert dish or stem ware


*Cinnamon Sugar Blend

1/4 cup granulated white sugar
1 Tablespoon ground cinnamon
Blend well.  Great to keep on hand.  Store in an airtight container.


Monday, October 19, 2015

Super Easy Healthy Granola

The first time I made granola, I found myself researching for an easy cooking method and just what ingredients should be included in the granola. Well I searched recipes and took what I liked from the dozens of recipes I read, merged cooking methods and wrote a recipe that I believed would work well. With that recipe I  created my very "first homemade granola".   

Since that first granola, I've made this about once a month and I do experiment with ingredients based on what's on hand at the time.  After I made my first batch of granola I realized that I had greatly over spent for years on boxed granola.  You can't beat the fresher flavor of homemade granola!  You are the boss when it comes to cooking!  Experiment!! I love creating in the kitchen which is playtime for me!  

The best part of making your own is it's exactly to your taste with the fruits and nuts you love best! And did I mention that the house smells amazing too?  Play with this recipe too as far as what you love best in your granola.  If you love more fruit or nuts....add more to taste.

Ciao for now!

JPKC


Rolled Oats


Super Easy Healthy Granola


Preheat oven to 250 degrees
Total baking time 60 - 65 minutes

In a large bowl mix together the following:

·      5 cups rolled oats (not quick cooking)
·      1 cup shelled Sunflower seeds or shelled pumpkin seeds
·      ½ cup wheat germ
·      ½ cup flax seeds
·      1 cup brown sugar
·      3/4 cup honey or maple syrup
·      ¼ cup coconut oil
·      1 Tablespoon vanilla
·      1 Tablespoon cinnamon
·      1 teaspoon kosher salt or sea salt


Spread on 2 cookie sheets either lightly oil sheets or use parchment paper.
Bake 20 minutes 

Stir in 2 cups of almond slivers.
Bake another 20 minutes.

Stir again.
Raise oven to 300 degrees for the final 20-25 minutes.


In a large bowl mix together:

·      1 cup raisins or dried cranberries
·      1 cup flaked coconut
·     3/4 cup dried mango, apricot, pineapple or papaya into bite sized pieces

After baking oat mixture, scoop the granola off the sheet pans into a large bowl with the dried fruits.  

Mix well and cool thoroughly.  


Store in airtight containers up to 3 weeks.  Serve with milk, over ice cream, with yogurt or however you love to eat your granola.


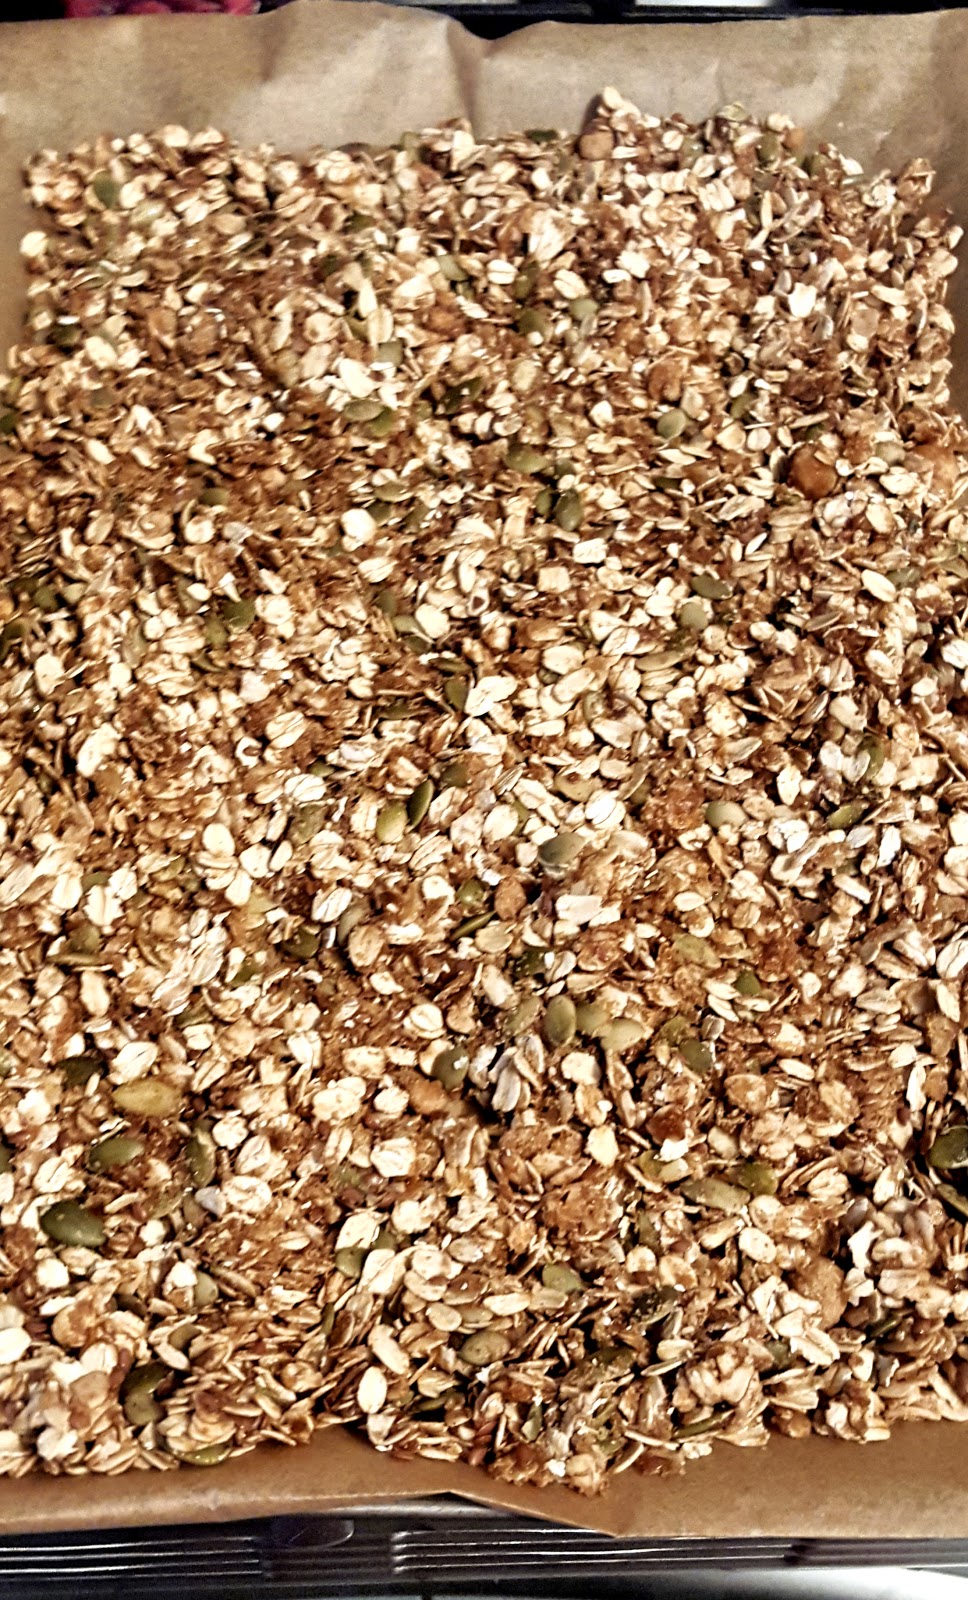
Finished granola ready to eat and store

Monday, October 12, 2015

Baking Bread 101....The Basics

Think I was 10 years old when I taught myself how to bake bread.  I'd already been cooking by that time for the family on a daily basis.

Baking bread isn't all that difficult at all!   There are some basic steps and techniques to follow. Once you understand those basics, the rest is fun and so rewarding with the way the aroma drifts through the house. After the bread cools down to room temperature who could resist cutting into the loaf and slathering it with a favorite spread, butter or even an herbed butter or, maybe even some olive oil with infused herbs?

This is one of my favorite recipes that I've made for many years and the one my kids loved growing up.  A nice basic whole wheat bread that works well for sandwiches and for toasting too.  This will make 3 smaller loaves or 2 good sized loaves.  The bread once fully cooled and after about 6 hours can be frozen very well wrapped and air tight in plastic bags such as these.  Use this trick....stick a straw into the bag and suck out the excess air to help preserve the fresh baked flavor.  To defrost just leave on the counter overnight.  You'll always have fresh bread without running to the store by keeping at least one loaf in the freezer.

Bread bags from King Arthur flour
I prefer King Arthur flour for my baking since it's a high quality product which I've used for years.   Grandmother always said used unbleached flour and I do follow that advice!


The Basics of Bread

  1. All ingredients unless noted should be at room temperature
  2. Make things easier and more organized by doing mise en place (mess in place - measure and assemble all ingredients and utensils before beginning)
  3. Lightly oil the loaf pans during mise en place and set aside.
  4. Yeast grows with a bit of sugar and salt will slow the leavening action of the yeast.   The ideal temperature for proofing the yeast is 100 - 115° too cool will take a lot longer to rise and too hot can harm the yeast growing.   
  5. There are usually 2 risings the first in a covered bowl and the second once formed into loaves
  6. Bread will rise slightly more after it's in the oven baking. 
  7. A slit on top of the loaf with help that and keep a free form loaf from expanding the "wrong" way which is sideways.  Use a serrated bread knife which is the easiest to make this slit.  The slit doesn't have to be deep but just enough to break the surface.
  8. Want a crisper crust?  Put a shallow pan of water in the oven with the bread when baking.
  9. Don't forget to have a cooling rack to fully cool down the loaves or any baked goods to cool.
  10. I have used a food processor or my stand mixer to do this but you can also do this by hand so I will list both electrified and old fashioned steps.
  11. It's just that simple...so don't let nerves get in the way!

Baked and time to cool 


Whole Wheat Everyday Bread

Ingredients

2 packages of active dry yeast (about 4-1/2 teaspoons or 1-1/3 ounces of a yeast cake)
3 Tablespoons of white or brown sugar
2 cups warm water  (100 - 115°)
1-3/4 cups of room temperature milk
1/3 cup melted butter
2 Tablespoons kosher salt  (or other salt)
3 cups whole wheat flour
5-6 cups bread flour or all purpose flour

Large bowl
Large board or very clean counter top
3 pans - 9 x 5 x 3" loaf pans  OR  2  10 x 5 x 3" loaf pans

Oven preheated to 425°

To mix by hand

Step 1:

Dissolve the yeast and sugar in the warm water in a very large bowl and let stand for at least 5 minutes to activate the yeast action. 

Step 2:

Combine the warmed mile (100-115°) with the melted butter and salt.   Add to the proofed yeast and stir well to combine.


Step 3:

Add the 3 cups of whole wheat flour to large bowl and mix well with wooden spoon.  Once combined add 3 cups (1 cup at a time)  of the bread or all purpose flour and mix well by wooden spoon or with your hands. The dough will be sticky and get harder to mix.  Add enough of the remaining flour to make a smooth firm dough.

Step 4:

Turn the dough out onto the board which has been lightly floured and knead well (yes- get your aggressions out on the dough!)  Keep turning and kneading for 5 - 7 minutes (think upper body workout) until it is smooth and elastic.

Step 5:

Shape into a ball.  Place in a lightly oiled or buttered bowl, turn so that the dough that was on the buttered bottom is now on top.  This will keep the dough from drying out during the first rise.  Cover bowl with plastic wrap or an absolutely clean towel.   Place in a draft free place to rise.  Check in about 45 minutes to 1 hour. Set a timer but if it takes longer to rise give it time. Dough should double in size.   It is done with the first rise when you poke the dough with 2 fingers and the finger marks don't bounce back.

Step 6:

Punch, yes take your fist and punch the dough down to deflate it.

Step 7:

Divide the dough into 2 or 3 pieces of equal size.  (Depending on the pans you're going to use)  Shape into a roll and place in buttered or oiled loaf pans.   Cover once again and let rise in a warm place again until doubled in size.  If you haven't, now is the perfect time to preheat the oven to 425° to heat fully while dough is rising in the pans.


2nd Rise and Ready to be slit and baked

Step 8:

Make a lengthwise slit in the very top of breads, place in the preheated 425° oven for 10 minutes. (Set the timer please) Then drop the temperature to 350° for 30 - 35 minutes.   Carefully turn a bread out of pan and rap the bottom, if it sounds hollow it's done.  (Doesn't want to pop out easily? Just run a table knife around the edges and that should do it)


Bread Slit and into the oven!

Step 9:

Let loaves cool fully to room temperature on a cooling rack.  You're going to want to slice that now but please and try it but resist until it's fully cooled down. (Will slice better too)

Step 10:

Enjoy!!!  If you're freezing do so within 6 or so hours after baking for best results.  (see freezing tip at the beginning)

So....for those of you using modern electrified conveniences here's the easier way to do this!


Mixer Method for bread

Mixer Method 

Step 1:

Dissolve the yeast and sugar in the warm water in a bowl and let stand for at least 5 minutes to activate the yeast action.  Combine the warmed milk (100-115°) with the melted butter add to proofed yeast.

Step 2:

In the mixer bowl add the whole wheat flour, salt and 3 cups of the bread or all purpose flour. Combine thoroughly so the salt is well dispersed in the flours.  Use the dough hook as in the picture above that comes with many stand mixers.   If you have a collar for the bowl that came with mixer it's a good idea to use that and start the mixer on the lowest speed to not be dusted with flour yourself, unless you like the dough boy look?  

Step 3:


With the mixer on lowest speed *slowly* add the liquids to the flour and mix about 5 minutes until very well blended.   Add 1 cup at a time additional of the white flour to mixer until the dough comes together and is firm smooth and elastic.  

Step 4:

Shape into a ball.  Place in a lightly oiled or buttered bowl, turn so that the dough in the bowl to cover the dough ball with butter.  This will keep the dough from drying out during the first rise.  Cover bowl with plastic wrap or an absolutely clean towel.   Place in a draft free place to rise.  Check in about 45 minutes to 1 hour. Set a timer, but if it takes longer to rise give it time.  Dough should double in size.   It is done with the first rise when you poke the dough with 2 fingers and the finger marks don't bounce back.

Ready to cover and proof (rise)


To finish follow "hand method" at Step 6 through Step 10.


And finally....Enjoy your bread!!  


Herbed Butter
These same steps can be applied to other bread recipes and even pizza dough which I'll write about another day!

Ciao for now!


JPKC